I wrote a Rust library called immense for synthesizing 3D structures with simple composable rules, inspired by Structure Synth. In the docs I cover the basics, and in this article I'll go over making a mesh from start to finish.
Here's a little demo of how expressive it can be:
rule![
    tf![
        Tf::saturation(0.8),
        Tf::hue(160.0),
        Replicate::n(36, vec![
          Tf::rz(10.0),
          Tf::ty(0.1)
        ]),
        Replicate::n(36, vec![
          Tf::ry(10.0),
          Tf::tz(1.2),
          Tf::hue(3.4
        ]),
    ] => cube()
]
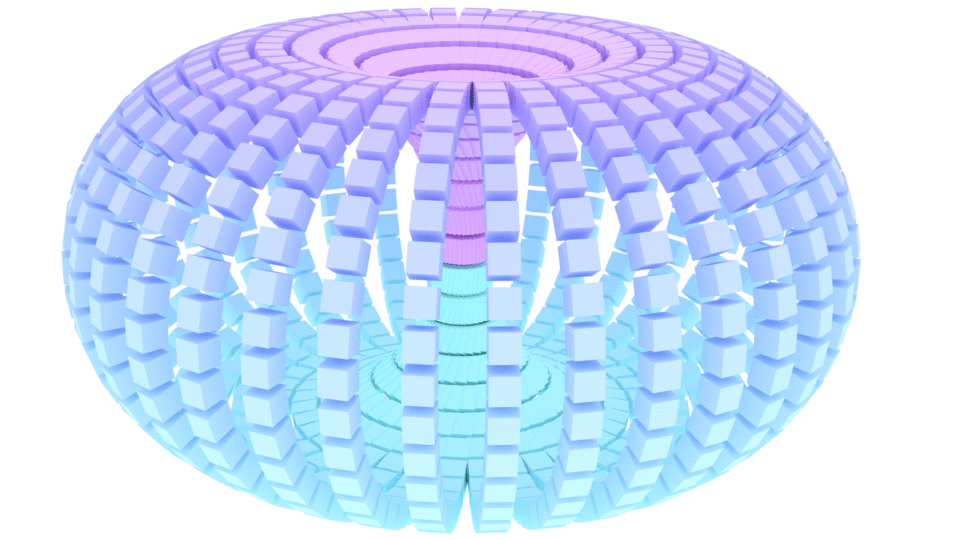
Table of Contents
We'll create this render:

To follow along I assume you have Rust and at least some familiarity with it. Also keep open the docs! They are thorough.
View a Mesh
Let's output a mesh and see it before we start iterating.
rustup default nightly
cargo new --bin structure
cd structure

cargo install cargo-edit

cargo add immense
cargo add failure
cargo add rand
In src/main.rs, paste:
use failure::Error;
use immense::*;
use std::fs::File;

fn main() -> Result<(), Error> {
    let rule = cube();
    let meshes = rule.generate();
    let mut output_file = File::create("mesh.obj")?;
    write_meshes(ExportConfig::default(),
                 meshes,
                 &mut output_file)?;
    Ok(())
}
If you cargo run you should see a new file called my_mesh.obj.
Now we'll need an object file viewer. I personally use MeshLab for its reload button. Open my_mesh.obj in MeshLab and you should see:
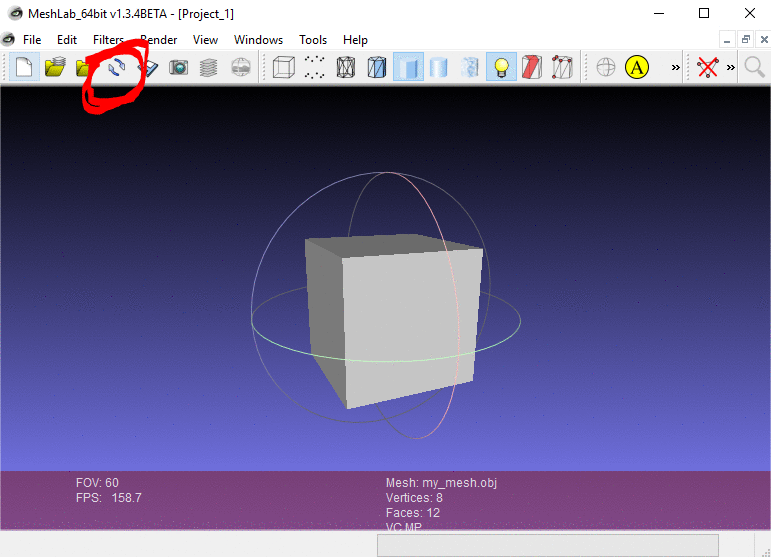
Notice the reload button I've highlighted. You can click this to refresh the mesh from disk whenever you cargo run to see your updates.
Synthesizing Our Structure

We'll first create a diorama shape (marked in red), then make each tile in the planes into a piano key pattern (marked in blue).
Diorama Shape
First we'll define a function to make a grid of a given rule:
fn grid(
  rows: usize,
  cols: usize,
  tile: impl ToRule
) -> Rule {
    rule![
            tf![
                Replicate::n(rows, Tf::tz(1.0)),
                Replicate::n(cols, Tf::tx(1.0)),
            ] => tile
    ]
}
and change our rule definition to
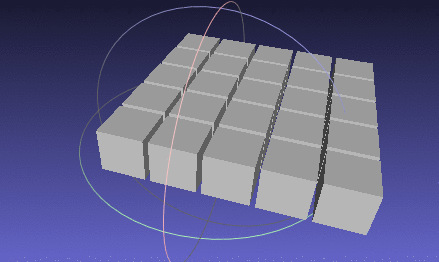
let shrunk_cube = rule![Tf::s(0.9) =>  cube()];
let rule = grid_of(5, 5, shrunk_cube);
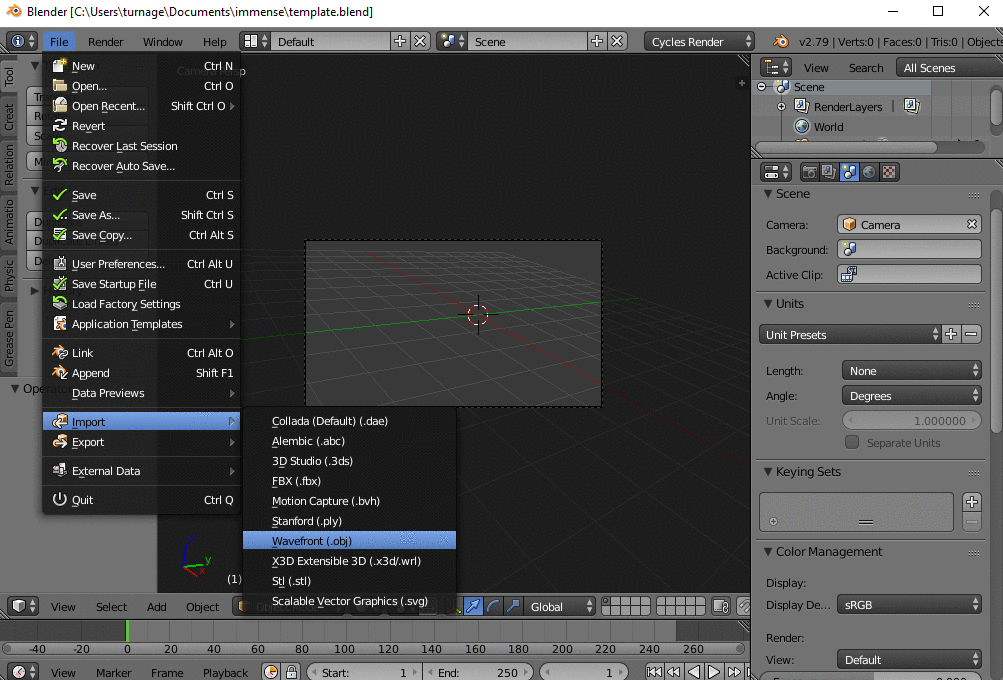
This repeats a downscaled (at 0.9) cube 5x5. We downscale just so it's easier to see the borders in the mesh viewer. It should look like this:
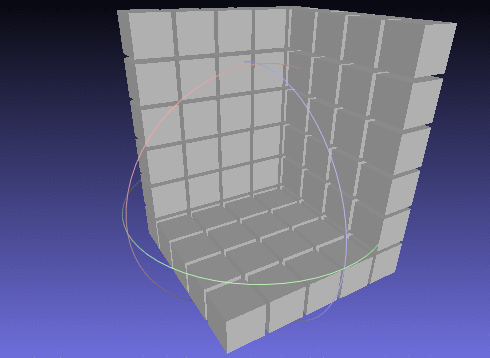
Now we'll repeat this rule with some rotations to get a diorama shape:
fn diorama(
  size: usize,
  rule: impl ToRule + Clone
) -> Rule {
  let plane = || grid(size, size, rule.clone());

  rule![
	  Tf::rx(-90.0) => plane(),
	  Tf::rz(90.0) => plane(),
	  None => plane()
  ]
}
let rule = diorama(size: usize, shrunk_cube);
Piano Keys
Our piano key rule needs to be generated lazily so that each instance is potentially different in color and height . For this we'll implement ToRule so that immense will call on it to generate a rule for each instance.
use rand::*;

struct PianoKey;

/// Generates a cube which is either slightly
/// elevated or sligthly depressed, and either
/// white or black.
impl ToRule for PianoKey {
    fn to_rule(&self) -> Rule {
        let elevation: Tf = *thread_rng().choose(&[
	        Tf::ty(0.2),
	        Tf::ty(-0.2)
	    ]).unwrap();
        let color: Tf = *thread_rng().choose(&[
            // White
            Tf::color(Hsv::new(0.0, 0.0, 1.0)),
            // Black
            Tf::color(Hsv::new(0.0, 0.0, 0.0)),
        ]).unwrap();
        rule![
            tf![elevation, color] => cube(),
        ]
    }
}
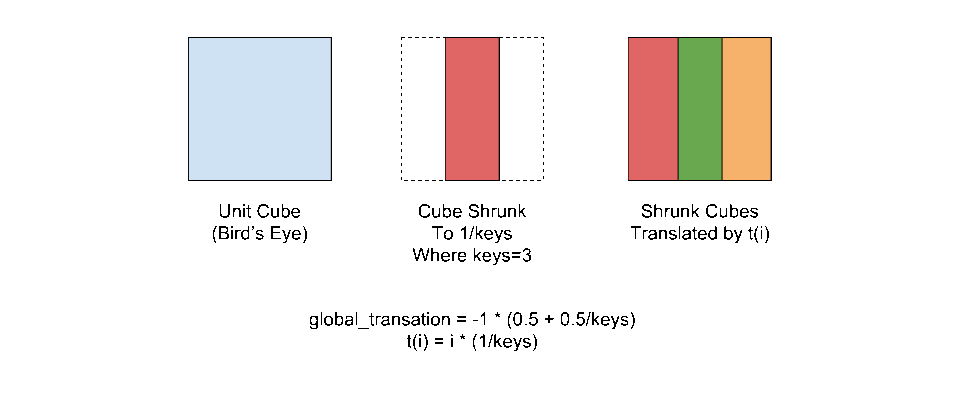
Now we need to squeeze a few of these into the x and z dimensions of the unit cube so we can plug a piano keys rule into our diorama rule. To do that we'll shrink each one on x to 1/keys and shift them -1* (0.5+0.5/keys). This is my best effort at a helpful diagram:
fn piano_keys(keys: usize) -> Rule {
    rule![tf![
        // Shift the cursor left to align our
        // shrunk cubes with the unit cube.
        Tf::tx(-0.5 - (0.5/(keys as f32))),
        // Shift each soon-to-be-shrunk cube by
        // 1/keys.
        Replicate::n(keys, Tf::tx(1.0/(keys as f32))),
        // Shrink each cube down to 1/keys on x
        // dimension.
        Tf::sby(1.0/(keys as f32), 1.0, 1.0),
    ] => PianoKey {}]
}
Finally we'll make this our rule and enable colors in our export config.
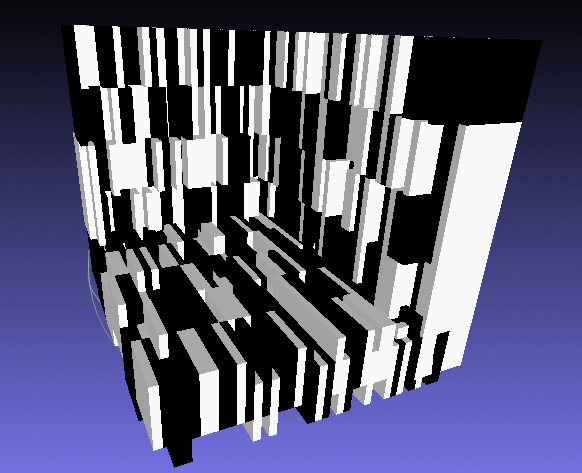
let rule = diorama(5, piano_keys(8));
let meshes = rule.generate();
let colors_filename = String::from("colors.mtl");
let mut output_file = File::create("mesh.obj")?;
write_meshes(
    ExportConfig {
        export_colors: Some(colors_filename),
        ..ExportConfig::default()
    },
    meshes,
    &mut output_file,
)?;
You should see something like this in your viewer.
Rendering
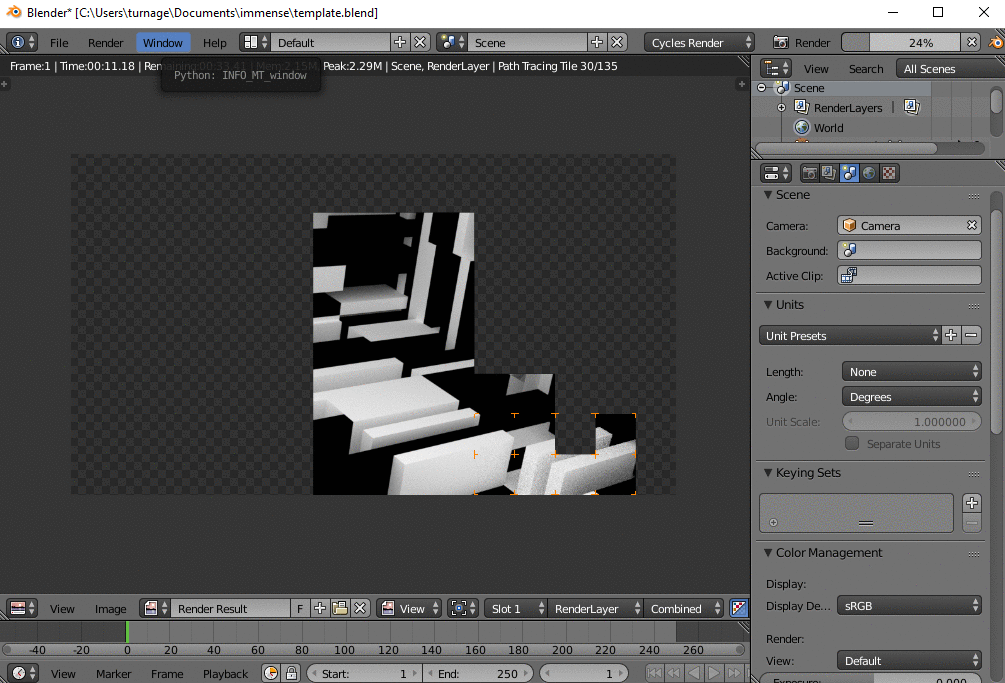
A real walk through on using a renderer is out of scope for this tutorial, but for fun's sake I've prepared a blender file for our mesh for anyone who got this far and isn't familiar with any renderers. Download
- Blender, a free and open source 3D toolkit with some renderers built in.
- The template blender file I prepared for this mesh.
Open the template file and import your mesh object file:
Press F12 and you should start seeing render progress!
When it's done you can save your result by pressing F3.
If you have any issues with immense or want to request a feature, please submit a github issue.